Renegade Row Alternatives

The Renegade Row is one of my favorite compound moves. It's the bee's knees for core stability, scapular movement, and back development.
But I get it. It's not everyone's cup of tea. When you start to row during the exercise, you shift your weight and the resistance onto a tripod (The two legs and one arm). This places your body off balance and you are forced to recruit a variety of muscles and stabilizers to maintain control.
Your hip muscles and rotational forces demand a certain level of strength, which beginner athletes may not possess at first. That's why we are going to look at Renegade Row alternatives today, that offer the same benefits (almost) minus the instability.
If you are unable to maintain good form during the renegade row, then today's article will introduce you to the alternatives.
What is the Renegade row?
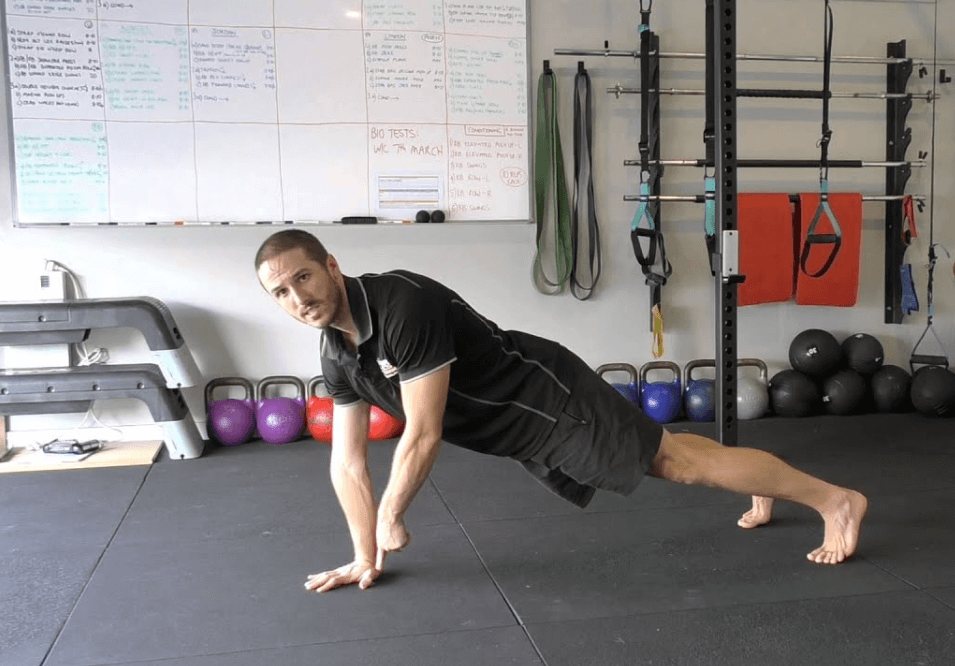
For those who are not familiar with the term, the Renegade Row is a compound exercise that targets the back, shoulders, and core.
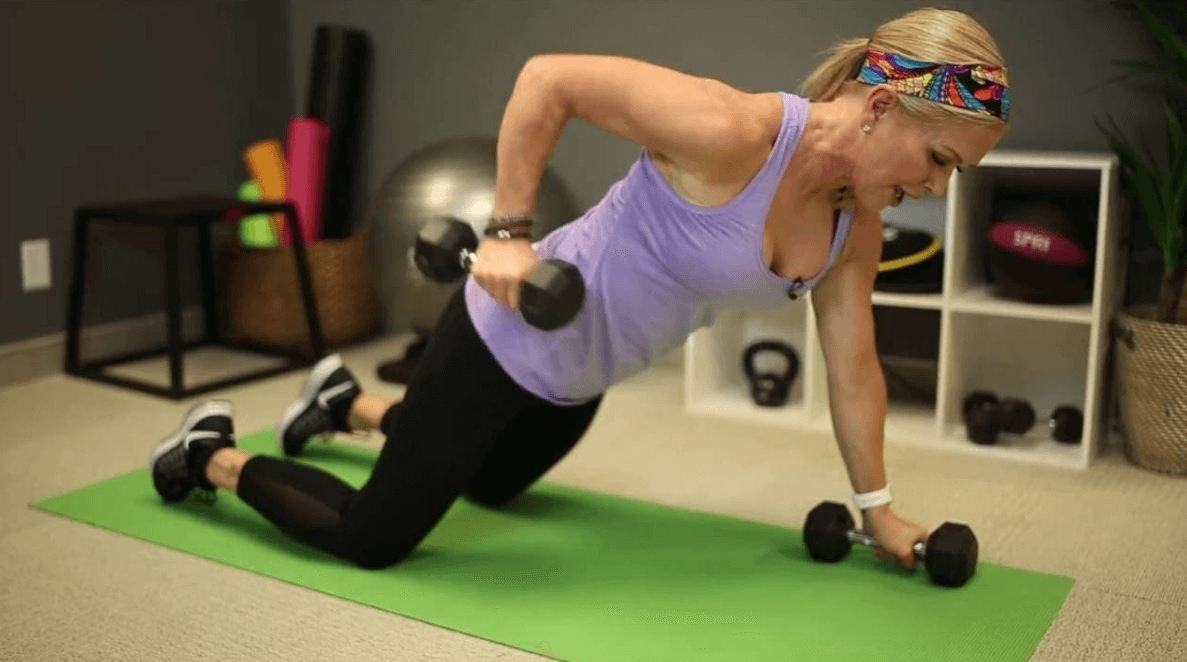
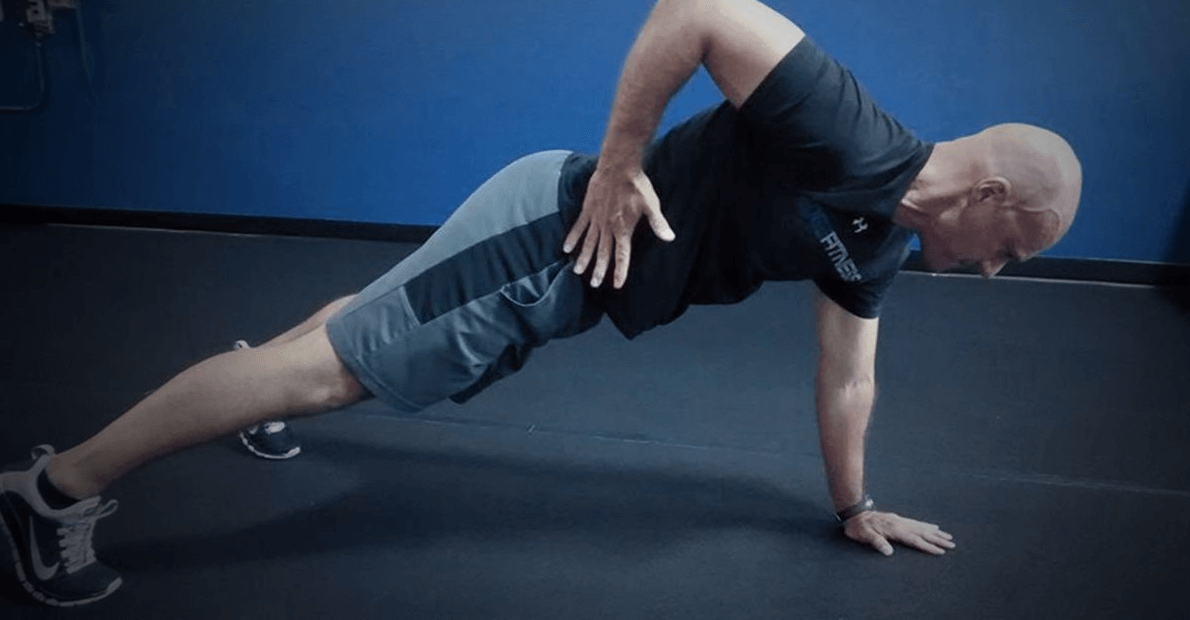
The exercise begins in a plank position with your palms resting on a dumbbell or a kettlebell and your feet shoulder-width apart. You then row one arm up to your chest lifting the weight, before lowering it back to the starting position.
You repeat this motion for the desired number of repetitions before switching arms.
The Renegade Row is a challenging exercise that recruits multiple muscle groups to maintain balance and control.
A Brief Look at The Renegade Row Exercise
Here's a step-by-step guide to the renegade row for those who want to give it a whirl for the first time, before trying the alternatives that we are recommending here.
Here is a video of how to do the renegade row:
Here are the steps to do the renegade row:
- Step 1 - Assume a plank position with your palms on the kettlebell and your feet shoulder-width apart.
- Step 2 - Row one of the dumbbells up to your chest and then lower it back down again, maintaining a tight core with your hips in a neutral position and your head facing the floor throughout.
- Step 3 - Repeat on the opposite side before returning to step 1 and switching arms.
For those who are wondering, I recommend using a kettlebell for this exercise as the center of gravity favors the move, a wee bit more than dumbbells do. Also, if you are using rounded dumbbells, they are prone to slide due to the sudden weight shift.
Pro Tip - Do not break your teeth during the renegade row.
Best Renegade Row Exercise Alternatives
Now that we've cleared that up, it's time to take a look at the best alternatives to the renegade row.
The big draw of the renegade row is its ability to throw your body off balance which makes you work harder on core stability. Therein lies some of the drawbacks too since not everyone may be ready for the instability factor.
So, we've brought you alternatives that provide similar (and in some cases better) benefits minus the risks and demands of an unstable body. We'll start with the more difficult, compound ones, and progress towards easier alternatives.
#1 - One Arm Dumbbell Snatches

A one-arm dumbbell snatch may not seem like the ideal replacement for the renegade row, but it is unarguably one of the absolute best.
It's a compound exercise that uses rapid hip movement to propel the weight upward and land with an overhead lockout. This ensures that you are not just working on your upper back, your core gets a good workout too. That's not all. You also recruit most of the lower body muscles.
Video - How to perform the one arm dumbbell snatch
Muscles worked with the one arm dumbbell snatch

The main thing to keep in mind while executing a one arm dumbbell snatch is that it's not just a shoulder exercise. You need to have explosive hip action as well if you want the weight to go up and stay overhead. This demands a certain degree of coordination which will come with practice after a few weeks of regular workouts.
Core
The core muscles are activated to keep your body in balance as the weight is lifted and lowered. The abs, obliques, and lower back work together to keep you safe from injury. Always ensure that you squeeze the core during both, the eccentric and concentric part of the exercise.
Shoulders and Traps
The dumbbell snatch fires up the shoulders and traps. Not only do you need to lift the weight, but also keep it steady at the top of its arc which further adds to the shoulder stress.
The traps connect your neck and shoulder regions, so they play a crucial role in stabilizing your body as well as lifting the weight.
Other exercises that work the shoulders and traps include the Australian pull ups, dumbbell floor presses, and a more advanced workout, the shrimp squat.
Legs
The explosive hip action punctuated by a rapid knee bend, demands that you engage your leg muscles too. This works out the quads, glutes and hamstrings.
The explosive hip thrust is the prime mover here. But we also need to emphasize on engaging the knees and ankles, since they contribute towards balancing the weight overhead. The calves stay contracted throughout for added benefits.
Instructions on how to do the one arm dumbbell snatch perfectly
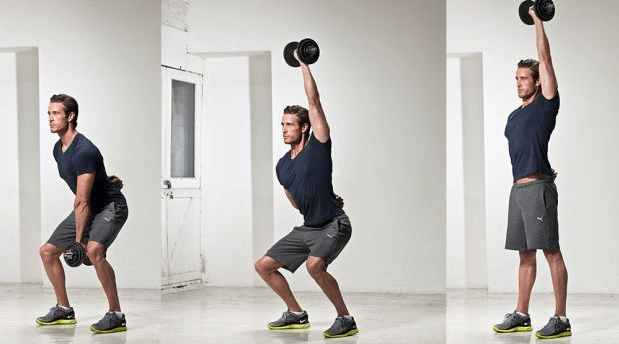
- Step 1 - Hold the dumbbell with one hand so that it hangs down on its outer edge. Tilt the weight slightly towards the fingers of your free hand.
- Step 2 - Set yourself into a quarter squat position with your knees bent, hips back and torso upright (slightly leaning forward).
- Step 3 - Now explosively extend your hips and push the weight up all the way over your head, while keeping your arm and shoulder stationary. At the top of the extension, shrug your shoulders and rotate your hand so that the palm is facing forward.
- Step 4 - Reverse the motion by lowering the weight under control back to the starting position. Make sure you don't bounce the weight off the ground.
Pro Tip

Practice the move with a very light weight until you can comfortably move heavier weight. The one arm snatch is a deceptive move, that looks easy but can quickly lead to injury if you're not careful.
Suggested Reps
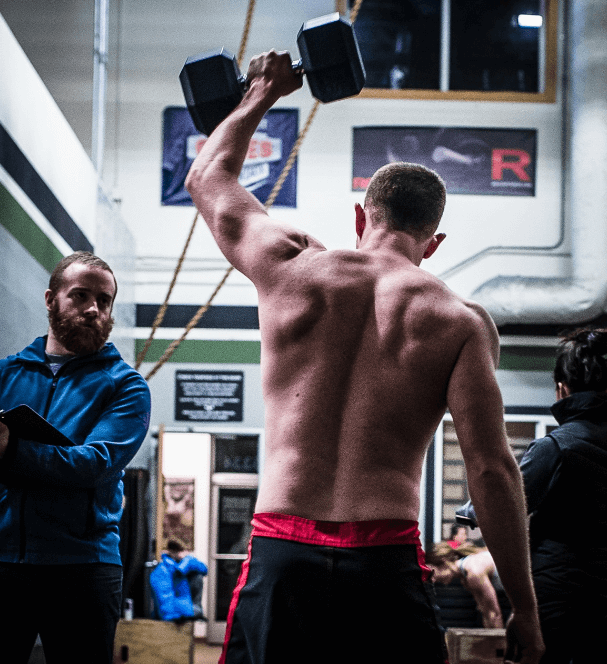
The one arm dumbbell snatch is a unilateral exercise like the renegade row. This means that you do not go for a high number of reps.
3 sets, per arm is ideal. Rest 60-90 seconds minutes in between sets. Increase the weight at each set until you can no longer perform any more perfect reps with good form.
#2 - The Half-Turkish Get Up
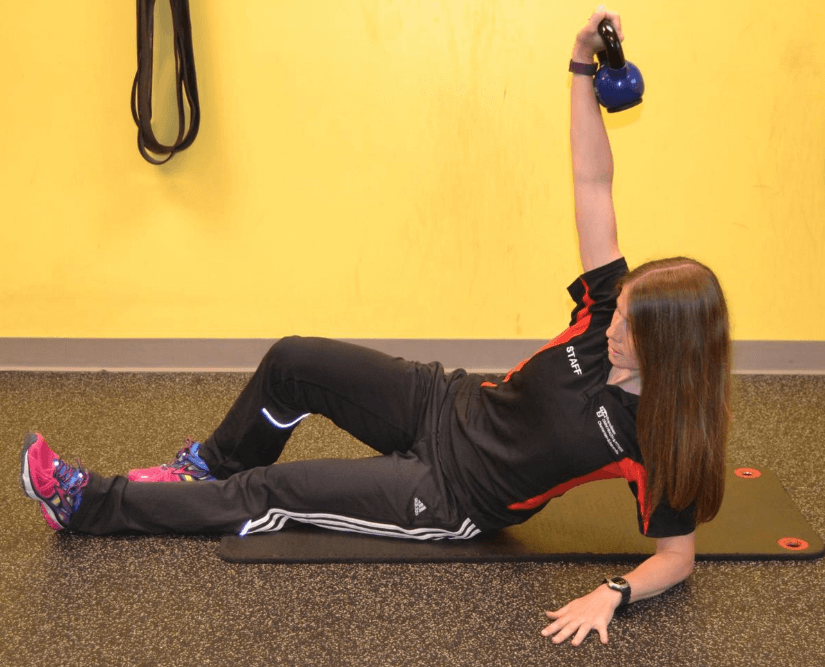
The Turkish Get Up is a monster move that works your whole body. It's a full-body exercise that engages your core, shoulders, traps, glutes, hamstrings and quads, and everything else under the sun.
But it’s an advanced move that takes time to learn. So we're going to show you a variation of the Turkish Get Up that's a little easier to perform and still provides a great workout - the Half-Turkish Get Up.
The Half-Turkish Get Up is exactly what the name implies. It's 50% of the actual exercise. Believe me, 50% is more than enough to fire up the core and work out your shoulders like never before.
Video - How to perform the Half Turkish Get Up
Muscles worked by the half get up
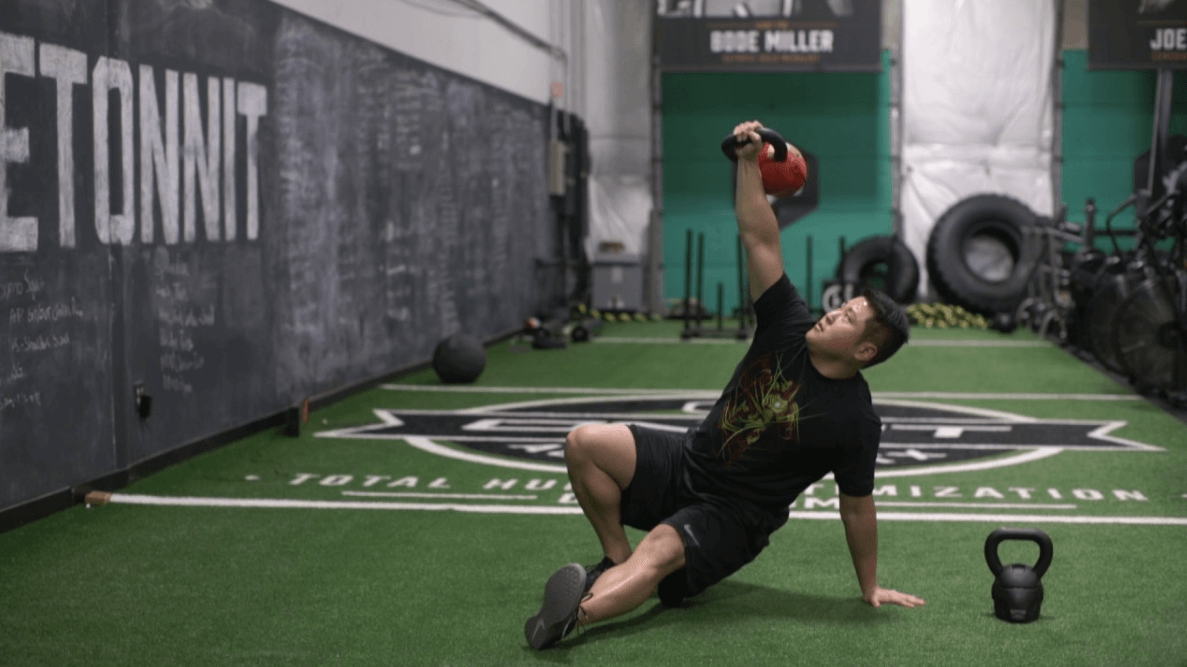
The Half TGU is a great exercise to work your shoulders, abs, core, legs and stabilizers. That's more than the entire checklist of muscles worked by the Renegade row. Told you, this is a monster move.
Shoulders
The shoulder muscles that are worked include the rotator cuff, deltoids, trapezius and posterior deltoids. The rotator cuff muscles keep the shoulder joint stable while the deltoids and trapezius muscles lift the weight. The posterior deltoid muscles pull the weight up from the shoulder to your ear and help you maintain it in that position.
Abdominals
The TGU requires a strong core to stabilize and balance your body as you go through the exercise. It recruits all the muscles of the abdominal wall - the rectus abdominis, external and internal obliques, and the transverse abdominis.
Other exercises that work your abdominals include, double crunches, standing oblique standing crunches, and star planks.
Back
The back muscles worked include the erector spinae, latissimus dorsi and trapezius. The erector spinae muscles extend the spine, while the latissimus dorsi muscles pull the shoulder blade down and back. The trapezius muscle helps to hold your shoulder blade in position.
Instructions on how to perform the Half TGU

- Step 1 - The Turkish get up starts from you lying on the ground in a fetal position. In the half TGU, you are seated upright on the floor. The left leg will be extended in front of you while the right knee is bent at a 45-degree angle and the right foot flat on the floor.
- Step 2 - Pick the dumbbell or kettlebell and hold it in your right hand. You can rest your elbow on your right thigh, just behind the knee. The left palm will be flat on the floor behind you, next to your lower back.
- Step 3 - Using your core muscles, slowly lift your torso off the floor and towards the upright position while keeping the left arm and leg stationary. Push the weight towards the ceiling. Stop when your torso is parallel to the floor.
- Step 4 - Hold for a few seconds then slowly reverse the motion, returning to the start position. You can perform the number of desired reps on one side and then switch arms.
Pro Tip
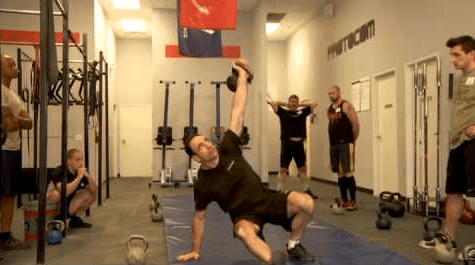
Maintain eye contact with the weight at all times. This helps you to maintain the alignment that's required to perform the lift correctly. Make sure you don't increase the weight beyond a point where maintaining alignment becomes difficult. In other words, use good form and avoid an injury.
Number of reps
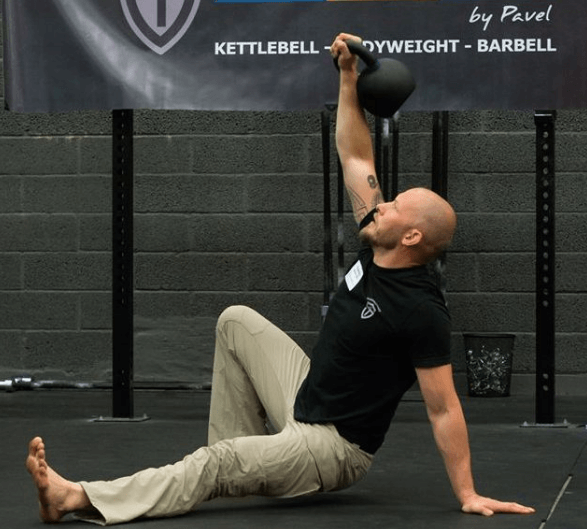
The Half TGU is not a conventional exercise. So there is no set number of reps you should perform. You can do as many or as few reps as you feel comfortable with. Just make sure you maintain good form throughout the set.
#3 - Weighted Pull Ups
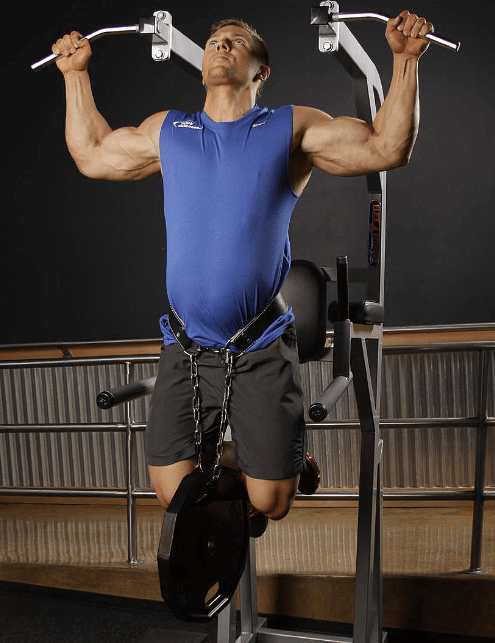
On the face of it, the pull ups might seem to be an easy alternative to the renegade row. It's hardly true. The sheer number of people who struggle to perform even one complete pull up without swaying their body wildly, is testimony to this.
So, what happens when you add some weight to this? The Pull up becomes infinitely harder. From 20-reps, some fitness buffs drop down to 5 reps straight away even by adding just 10 lbs. to their body.
Video - How to perform the weighted pull-up
Muscles worked by weighted pull ups
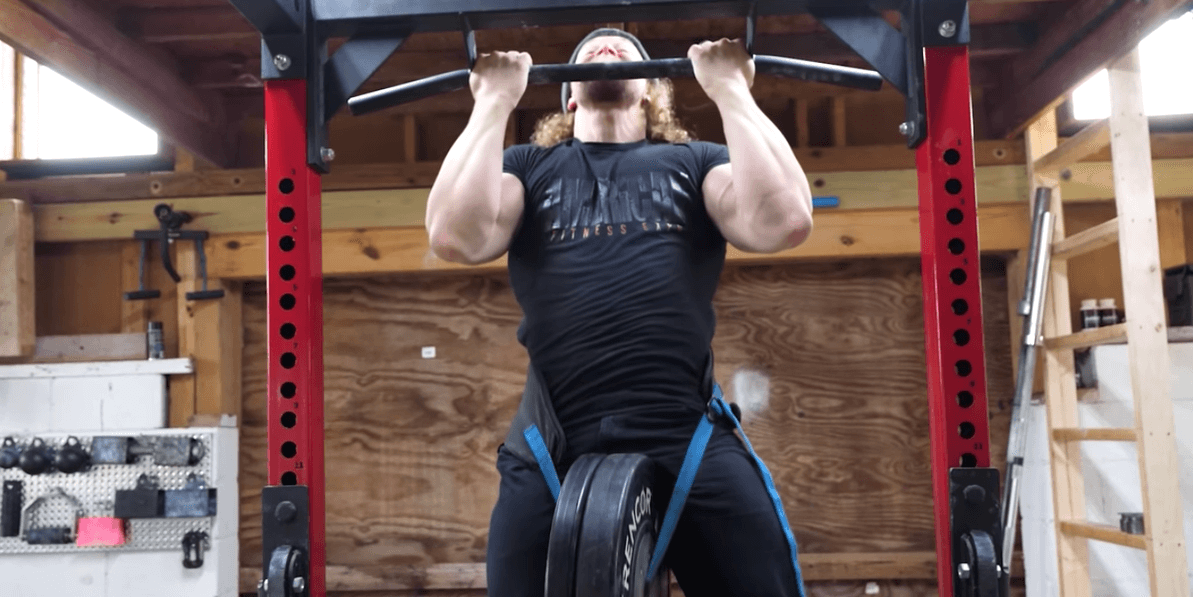
The Weighted Pull Up activates all the muscles that the conventional pull up does. But there’s an additional load on the muscles, making them work harder. The main muscles that are worked are the latissimus dorsi, biceps brachii, brachioradialis and the elbow flexors.
Back
The muscles of the back work harder than in a regular pull up, to stabilize the body and keep it from swaying. This includes the erector spinae, trapezius and rhomboid muscles. Th latismus dorsi muscles are the prime benefactors of the added resistance though.
An easier exercise you can do to work your back is wall angels, you can also do low rows, upright rows or high pulls to work your back and prepare yourself to do weighted pull ups.
As they say, if you seek a V-taper, then the pull up is the king of exercises. And if you want to build wide lats, then you need weighted pull ups in your routine.
Abdominals
The pull up is a compound exercise. This means the rectus abdominis - the muscle that makes up the six-pack gets recruited too. The external and internal obliques and the transverse abdominis also get into action to stabilize and balance the body.
Shoulders
The pull up is a great shoulder developer, although the shoulder muscles are a secondary group in performing the exercise. There are some tips to make it more shoulder intensive though. You can switch from a wider-than-shoulder, overhand grip to a narrower, underhand one.
Instructions to perform the weighted pull up
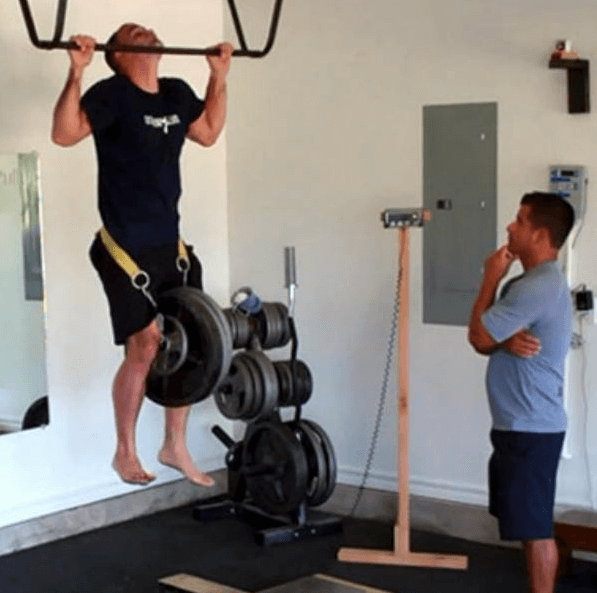
- Step 1- Use a weight belt or a weighted vest. If you do not have these, you can just fill a backpack with as much weight as you want to add. This works fine too. Hang on the bar with your chosen grip.
- Step 2 - Maintain a stable core as you lift your body upwards. Keep your shoulder blades pinched together and your chest up.
- Step 3 - Continue to pull yourself upwards until your chin is over the bar. Pause for a second and then lower yourself back down to the starting position.
Pro Tip

Use a weight that's challenging but manageable. You should be able to complete at least 5 reps clean without using leg drive. Leg drive is a term used to describe using your hips to lift your body upwards.
Number of reps

The number of reps is entirely up to you and how much weight you've put on. The best idea is to start off with a weight that allows you to do 3-4 reps with clean form. Do 2-3 sets and you are off to a great start.
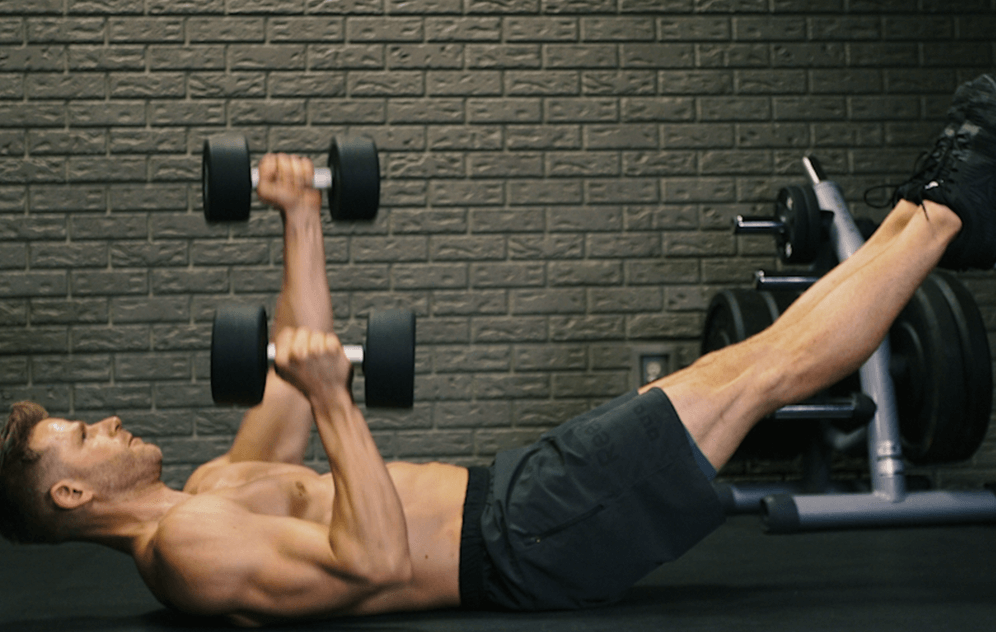
#4 – Hollow Hold Dumbbell Press
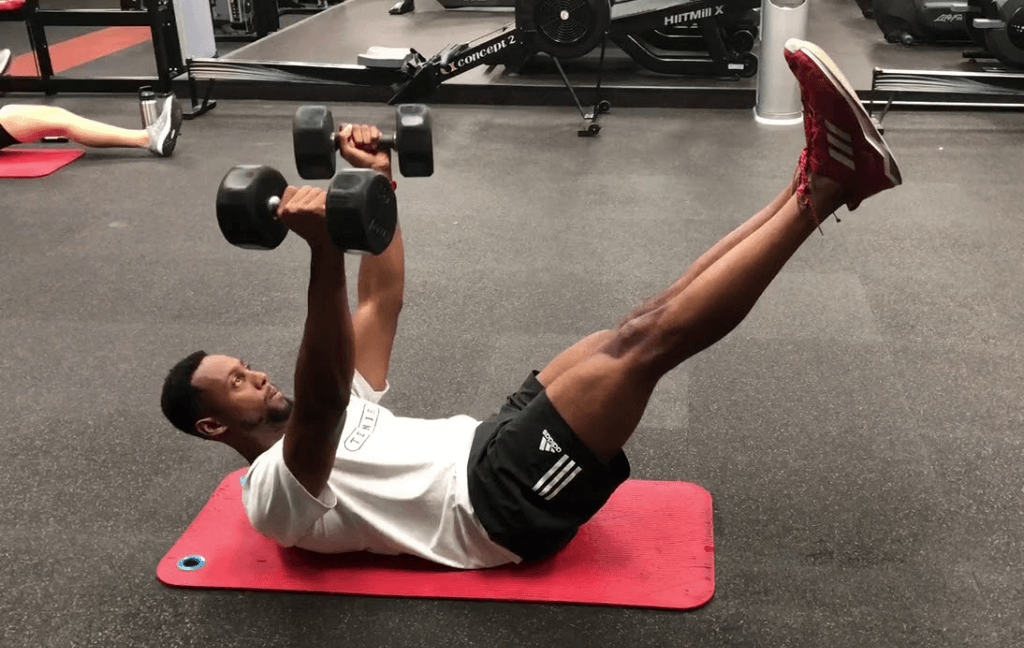
The Hollow Hold is an isometric move that primarily targets your abdominal section and core. But after you master this move, there's no progression. Until you throw in some dumbbells and press weight that is.
The Hollow Hold Press is a modified alternative to the Renegade row. This is a compound workout that targets the core as well as the shoulders and arms. But this is two exercises clubbed together and it demands a fair bit of core strength.
Video - How to perform the hollow hold dumbbell press
Muscles worked with the Hollow Hold Dumbbell Press
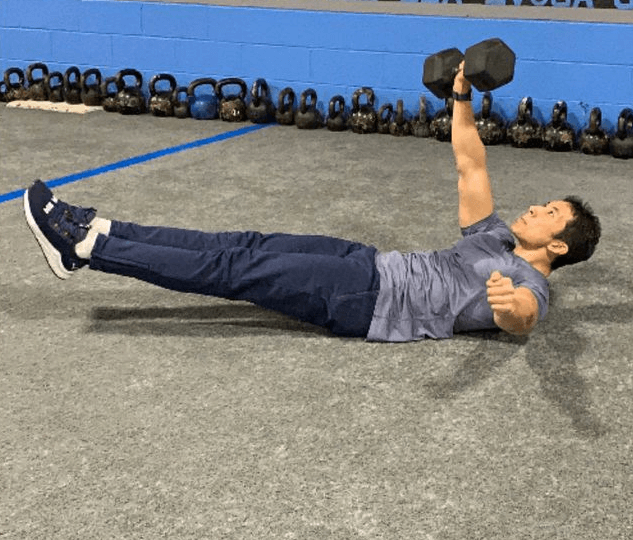
Moving weight in an isometric hold position is never easy. That's what makes the Hollow Hold Press such a great exercise for the core. But there are secondary benefits too, like building strong shoulders and working on your pressing strength.
It recruits all the muscles of the upper body.
Core
The Hollow Press is a great way to build core strength even without the weight. When you add weights and move them, you force the core to work harder. The muscles that are primarily targeted are the rectus abdominis, external obliques, internal obliques and transverse abdominis.
Shoulders & Arms
You are essentially pressing when you are completely off balance. It's vital to maintain stable shoulders throughout the press, ensuring that you don't slouch inwards. It will fire up the anterior deltoids, pectoral muscles, biceps and triceps.
Instructions to perform the Hollow Hold Dumbbell Press
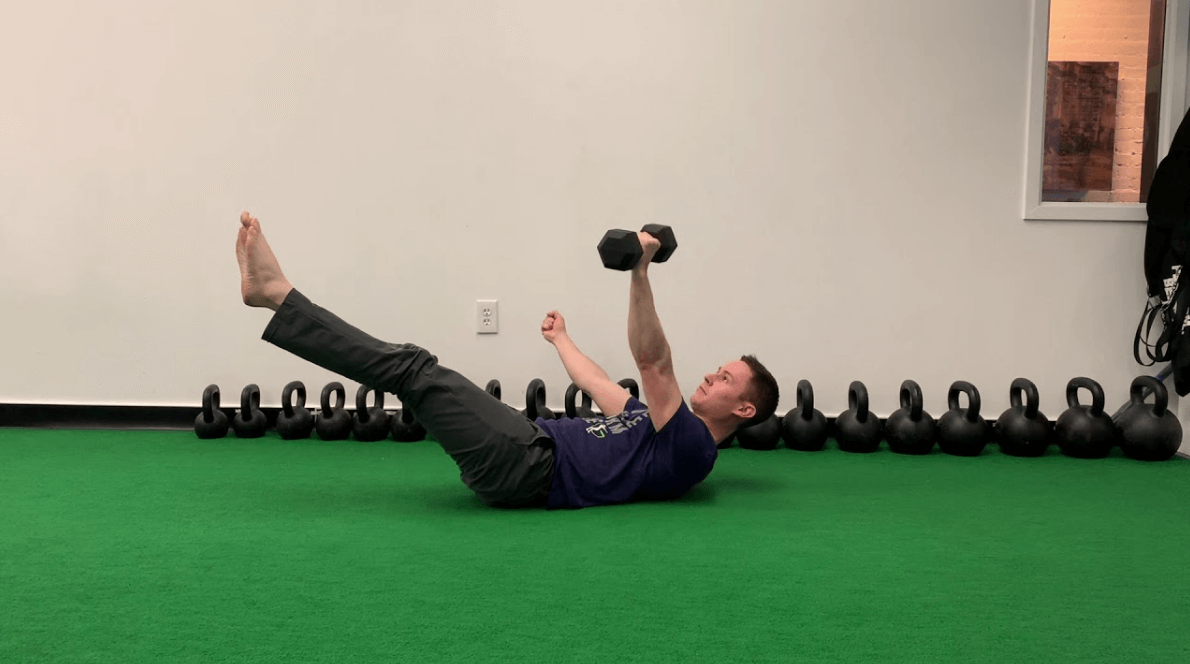
- Step 1 - Lie flat on your back with your knees bent and the top of head touching the ground. Your feet will be together with toes pointing up.
- Step 2 - Grab two weights and hold them near the chest. Slowly lift your feet a few inches off the ground, bracing your core and pressing the glutes into the ground. You lift with your core as they say.
- Step 3 - Keep breathing throughout the move and slowly press the weight up, extending your arms fully. Keep your core engaged the whole time.
- Step 4 - Hold for a second and then slowly lower the weights back to the starting position. You can press the weights together, or alternatively. Turning this into a unilateral move adds that extra bit of instability.
Pro Tip

Ensure that you can do the non-weighted variety of the Hollow Hold Press with perfect form before you add any weight. Even when you add weight, start with a light weight and work your way up.
Focus on bracing the core and maintaining the integrity of the spine. No slouching, inwards or backwards. Want to make it even more challenging? Add some bicycles and bring each knee to the chest as you press up.
Number of reps
The number of reps is entirely up to you. As with all compound exercises, aim for 3-4 quality reps to start off with. Increase the weight if you can do more than that.
FAQs about alternatives to Renegade Row Exercise
For those of you who have some more questions about the renegade row exercise alternatives, below are several extra answers that should help you understand this exercise better.
Q. What exercises can replace Renegade Row Exercise?
A. The Renegade Row is essentially a combination of a plank and a dumbbell row. It's an isometric hold with a unilateral anti-extension move. So, there are very few mirror replicas of this move. Having said that, the hollow hold dumbbell press and the one arm dumbbell snatch are great alternatives that recruit the same muscles in a different way.
Q. What can I do instead of renegade rows?
A. You can pick any one of these 4 exercises to replace the renegade row. The idea should be to maximize muscle recruitment and core stability. Any of the four alternatives will do the job.
Q. What is the easiest substitute for Renegade Row Exercise?
A. That depends entirely on your level of core strength. If you are just starting out, the Hollow Hold Dumbbell Press or even the basic plank would be a better replacement. Planks are an isometric hold that will help you strengthen your core. If you are looking to replicate the rowing move, then even a normal bent over dumbbell row can be a good alternative.
Q. Why are renegade rows so hard?
A. Because they are a combination of two very effective moves - the plank and the dumbbell row. They target a wide variety of muscles and put you in a compromising position. It's not meant to be easy, that why this exercise is popular among athletes.
Q. How can you make the renegade row easier?
A. Well, you can start with no weight to begin with. Just hold an empty water bottle and work your way up. You can also do a basic plank or the hollow hold dumbbell press to ease yourself into this move. If you find that the row is too difficult, try the shoulder tap instead, where you lift one arm and tap the opposite shoulder instead of rowing.
Q. Are Renegade row variations and modifications effective?
A. They sure are. But for overall body development, you'll have to focus on the bigger picture. Create a fitness routine that's a mix of different exercises and variations. That's the best way to see results.
Related Readings:
- I Ended up Doing 1000 Pushups a Day
- One Punch Man Workout – I Did 100 Pushups, 100 Sit-Ups, and 100 Squats for 30 Days – Results and What I Learned!
- What Happens If You Do 500 Pushups a Day? My Story & Results
- How Many Push Ups Should an Average 18 Year Old Do?
- 7 Best Arm Exercise Bikes – Reviewed & Rated
Sources:
Ben Mayz
Hi there! I'm Ben, main author and chief editor at Fitlifefanatics.com. I have been obsessed with Strength Training and Fitness for 18 years now.
My passion for living a happy fit lifestyle is what made me realize that fitness is what I wanted for my future.
I went on to earn my Masters in Sports Training & Biomechanics.
My passion for Strength training & fitness and my love of helping others is what made me start Fitlifefanatics.
Here, myself, and a team of specialist aim to provide the most accurate, and actionable information possible in hopes to help foster the fitness community forward.
You can learn more about Fitlifefanatics on our About Page


