Leg Extension Alternatives – Best Substitute Exercises
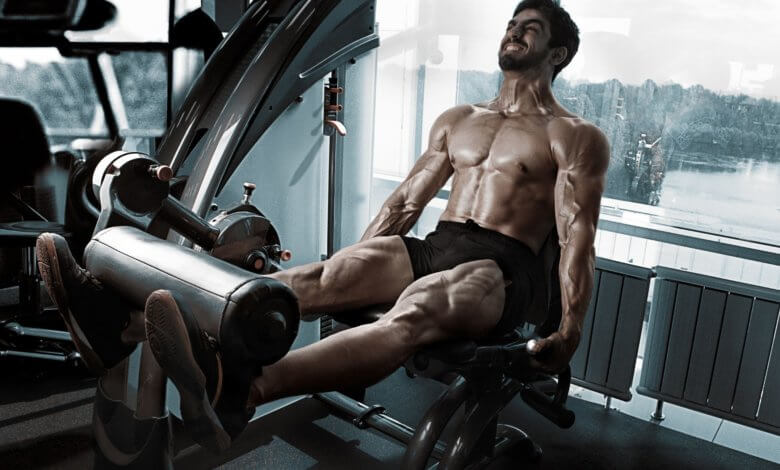
Leg extension alternative exercises.. the exercises that separate gym bro from real bro.
What’s the best way to tell apart a gym bro, from a seasoned lifter?
Look at their legs.
In one case you’ll see a thin pair of twigs, disproportionate with their torso and upper chest. You know, the guy that just can’t seem to get his chest and leg workouts in sync, so he benches more than he squats… aka the gym bro.
In the other, you’ll see a thick, powerful set of tree trunks. I mean, just look at a serious powerlifter like Ed Coan.
If you’re trying to build great legs or already have them, you might be familiar with leg extension.
It’s one of the greatest quad exercises out there and including it in your routines will do wonders for your quad size and definition.
However, sometimes life gets in the way of greatness. Maybe because of age, maybe because of accidents, you might find your knees do not agree with leg extensions at all.
Well if you are like most, including myself, you will come to find that leg extensions can cause your joints some stress.
It is one of the most finicky joints out there and the leg extension puts quite a bit of stress on the joint.
Here I am going to show you the best leg extension alternatives so that you can build amazing quads without having to ice your knees every night.
What is the Leg Extension
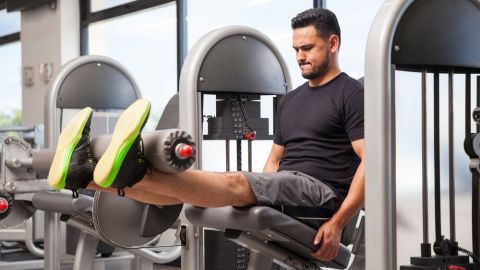
For those of you who don’t know, the leg extension is a quad isolation exercise that is quite simple when you look at it, but nevertheless extremely effective.
It works like this, you sit in a chair with your back straight. Your knees should be pointing straight ahead of you and then you raise your feet by extending your legs into a straight position.
In principle, that’s all a leg extension is, but if you try it you’ll realize that there isn’t much challenge to it, and without pushing yourself you’ll build no muscle – unless you’re trying to make your calves smaller.
That’s why leg extension machines are built.
These are typically lever machines with soft pads for you to push on with your legs. By connecting the lever to a pulley system and a weight stack – you know, pretty much like on a lat pulldown machine.
This way, you dramatically increase the resistance so that you can lift more weight and build more muscle.
Most leg extension machines allow for different seat setups and allow you to limit the range of motion of the lever to make the rep longer or shorter.
They are great because they allow you to work each leg separately if needed to avoid or fix imbalances.
Make sure to lift slowly and be careful with the weight. Even if you have no knee issues, it is best to avoid straining it unnecessarily.
Remember the leg extension is an isolation exercise, if you want to lift heavy you should do enough squats – this can be smith machine squats, sumo squats, goblet squats, or shrimp squats… as well as other compound movements, like the smith machine deadlift or the Zercher deadlifts.
Benefits of the Leg Extension
Listed below are the benefits of the leg extension exercise
Build HUGE and DEFINED Quads
Everyone on the internet will tell you that the king of leg exercises is either the squat or the deadlift, and they’re not wrong.
For natural lifters, the importance of compounds is unparalleled.
However, that doesn’t mean it’s the be-all-end-all of leg development. In fact, depending on your physiology and leverages, squats and deadlifts may be much more focused on your hamstrings, glutes, and lower back than your quads.
That’s where accessories come in, most notably, the leg extension.
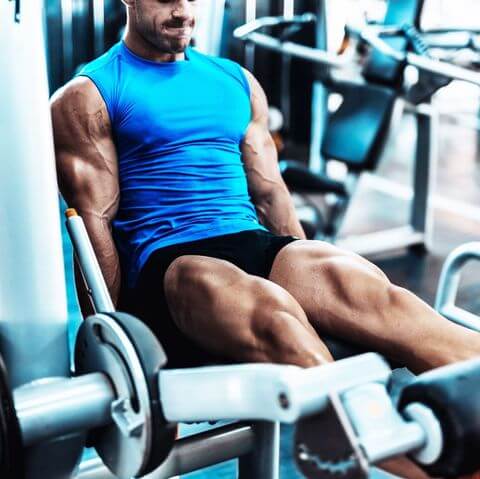
As I said above, it is a quad isolation exercise, which means you’ll be putting them under a lot of stress since it can’t work in conjunction with other muscles.
Not only will it help you finish off your quads after compounds, but it will also help you get more defined quad muscles by switching up which side of the quad is worked. This can also be done with squats, but it’s a lot harder and can mess up your form.
Target your Quadriceps at Different Angles
You’ve ever seen those pictures of the bodybuilder whose quads stick out to the sides of their legs? Ronnie Coleman for example, or the teardrop shape they get right next to their knees?
Chances are you have, and are wondering how you can get some yourself. Or at least make your legs look good. This is where the angle at which you work your muscles comes into play.
If you work the inner side of your legs more than the sides, you’ll start developing a teardrop. If you work the sides you’ll get a wider look.
This is usually determined by your squat stance. If it’s very wide, with your toes and knees flaring out, you’ll hit the inside for the most part. If you squat with a narrow stance, you’ll feel it on the inside.
Theoretically, you could just switch up your squat stance, but this is dangerous because it could mess up your form and cause injury. It’s much more advisable to incorporate leg extensions as a way to work the side that is getting left behind.
You do this by doing leg extensions while twisting your foot and knee to one side or the other. If you twist your toes towards each other, you’ll feel the burn on the outside of your quad. Twist it the other way and you’ll feel it on the inside.
Be aware that this may add a bit more strain to the knee joint, so keep the weight lower and the reps higher.
Gets the Blood Flowing and your Quads PUMPED
Another great use of the leg extension is to get the blood flowing into the muscle. This will first get you pumped, which is always fun, but it will also have other effects depending on what stage of the workout you’re on.
If you’re just starting up, it’s a great way to warm up to reduce the risk on injury. A couple of low-weight, low-intensity sets can get your muscles ready to work without fear of tears or other issues.
But that’s not all, leg extensions can also be used at the end of a heavy leg workout to avoid leg soreness the next day!
We’ve all had it before, you hit your legs really hard, and the next day you can’t walk. This is caused by a buildup of lactic acid that causes inflammation and doesn’t allow the nutrients to get to your legs and feed your muscles what they need to recuperate.
This often happens when you set out to do single-set training where you push your muscle to failure. You may alleviate most of the soreness with the use of Theragun after your workout, but other massagers like Vybe Percussion or Medmassager work just as great too.
Even so, it’s advisable that you stick to doing 1 set to failure 3 times a week at most, although some seasoned fitness buffs (who know what they’re doing) sometimes do 1 set to failure every day.
Related: Running After Leg Day, Should You Do It?
By doing some light, high-rep sets of leg extensions, you get the blood flowing, which will wash away lactic acid and allow nutrients to go into your muscles where they are sorely needed.
Not only will you have less pain, or none at all, but you’ll also be ready to hit your legs sooner so that you can keep pushing yourself!
Leg Extension Alternatives
Listed below are the alternative exercises to the leg extension
Alternative Exercise 1 – Front Squats
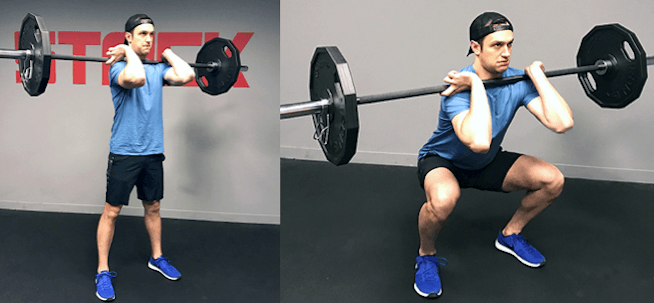
For a long time, the front squat was an exercise done mostly by Olympic weightlifters, but recently in part thanks to the popularity of Crossfit, the front squat has increased massively in popularity.
Squats tone the thighs, work the glutes, and overall help you get a stronger lower body physique.
While usually done as a part of a larger movement, like the snatch or the clean and jerk, the front squat can be done by itself to put higher stress on the anterior chain, the front of your body, instead of the anterior chain like a regular back squat.
The result is a higher load on your quadriceps, which will have to provide most of the force for the movement, leaving the glutes and hamstrings as accessory muscles.
How to do a Front Squat
Listed below are the steps to perform the front squat exercise
Step 1 – Set Up
The Front Squat setup is almost identical to a regular back squat. You begin with the bar safely on the power rack, grabbing it barely wider than shoulder-width apart.
Now approach the bar and without letting it go, lower yourself until the bar is touching your upper chest. Once you’re there, lift your elbows as high as they can go. Remember to keep your back straight and your shoulders squared.
The weight of the bar should end up resting on the little divot that’s created in your shoulders, between your delts and your body, when you lift up your elbows.
Related: Best Cheap Squat Racks, Stands, & Power Racks for Those on A Tight Budget
Step 2 – The Squat
Once you’re holding the bar correctly, drive up to lift it off of the rack, take a step back and stand with your feet shoulder-width apart.
While everyone’s squat stance is different, some helpful tips are to flare out your toes and spread your knees wide.
Once you’re comfortable, brace your core and back and squat like you would a regular one. Go down until your hips are below the crease of your knees and then drive up to return to the starting position.
Be careful to always keep your elbows up, if you lower them, the weight will tip forward and you’ll lose your balance.
Other Considerations – Hand Position
For many of us, the toughest part of the front squat isn’t the squat itself, but holding the bar correctly. There are two ways you can hold the bar in a front squat, the Olympic weightlifting way, or the CrossFit way.
Olympic weightlifters will hold on to the bar with the tips of one or two fingers only, letting it rest almost entirely on their shoulders. This position will put less strain on your wrist, but can cause shoulder pain and even bruising if you’re not used to it and the load is high.
Crossfitters tend to use a full-hand grip for this lift. It’s easier to teach to beginners and will not cause pain in the shoulder, but puts a lot more stress on the wrist joint and requires better wrist mobility.
However, some of us with poor wrist mobility may not be able to perform the lift with either of these grips, because the wrist joint is so tight, you’ll feel pain as soon as you try it.
For these cases, I suggest looping a lifting strap around the barbell and holding on to the strap instead. This way your wrist doesn’t need to bend at all and you can squat to your heart’s content.
Video Demonstration of How To Do Front Squats
Alternative Exercises 2 – Lunges
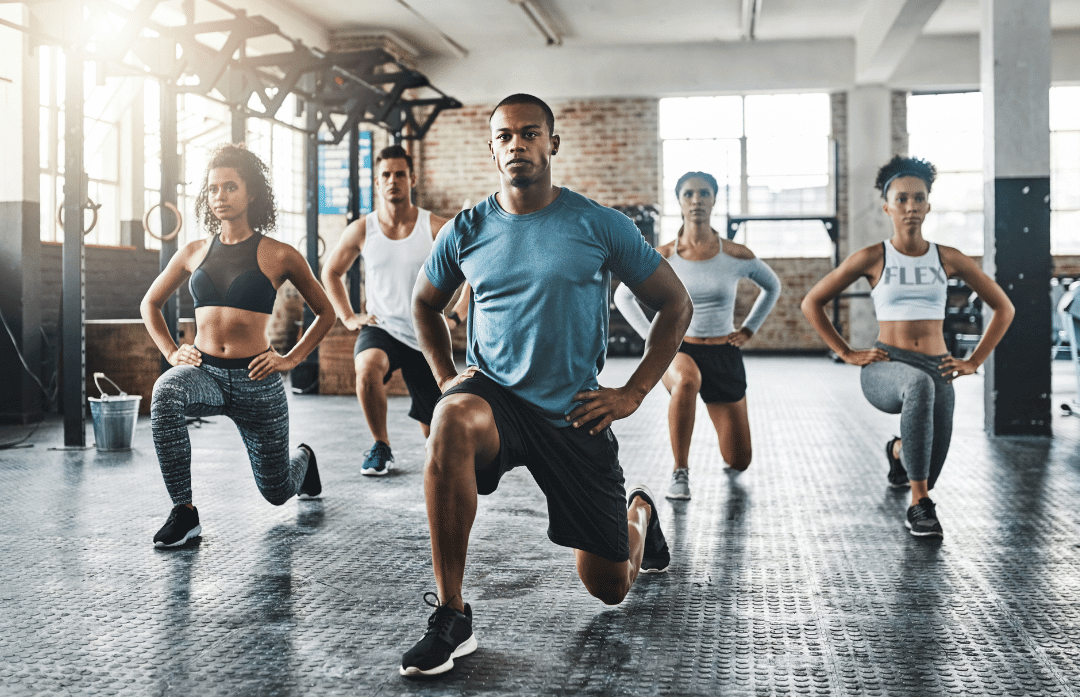
Lunges are a great exercise for anyone looking to work out their leg muscles without putting any strain on their joints. Plus they have the added benefit of being a very natural movement, so people can pick up on the technique very quickly and begin their workouts.
If you’ve ever seen someone take a knee, you’ve basically seen them do a lunge. It can be done just with your body weight for beginners, or with added weight to increase resistance as you get better and your muscles stronger.
How to do a Lunge
Like we said above, a lunge is a pretty simple movement, but there are still some cues you should keep in mind, so here it goes.
- Stand with your back straight and your feet shoulder-width apart.
- While bracing your core, take a large step forward with your right foot. Make sure that your foot makes contact with the ground heel first.
- Begin lowering yourself while keeping your left foot on the ground. The right thigh should end up parallel to the floor, while the left one point straight down.
- To avoid your knee traveling forward too much, make sure to keep your hips loose, your butt should travel straight down.
- Once your left knee reaches the ground, push on your right heel to stand up, switch sides and repeat.
How to make lunges heavier
As you go forwards in your fitness journey you’ll start to realize that bodyweight exercises aren’t really cutting it anymore, barely giving you a workout unless you do thousands of reps.
When that happens the smart thing to do is to start adding more resistance to the exercise, this will cause further strain on your muscle fibers and cause adaptations, also simply known as muscle growth.
If you’ve reached this stage for lunges, there are two things you can do to add more resistance. You can either use dumbbells or barbells to increase the weight you’re pushing.
While there are some differences, your first choice should be what you already have, especially when working out from home.
Using dumbbells has the benefit of simplicity and speed. It’s a lot faster to grab a pair of dumbbells off the rack than it is to load up a barbell.
Related: Best Place to Buy Dumbbells & Weights
Furthermore, if your balance is not the best, having equal weights hanging on each side can help. However, as the weight goes up, you might find yourself unable to hold heavy dumbbells for so long and may be limited by grip strength.
Barbells may take a little more time to set up, but you won’t have any issues with grip strength, as the weight will rest on your shoulders rather than dangle off of your hands.
Though this also means you should be extra careful about bracing and core tightness.
If you’re looking to up the difficulty even more, I suggest you check out our next leg extension alternative.
Alternative Exercise 3 – Bulgarian Split Squat
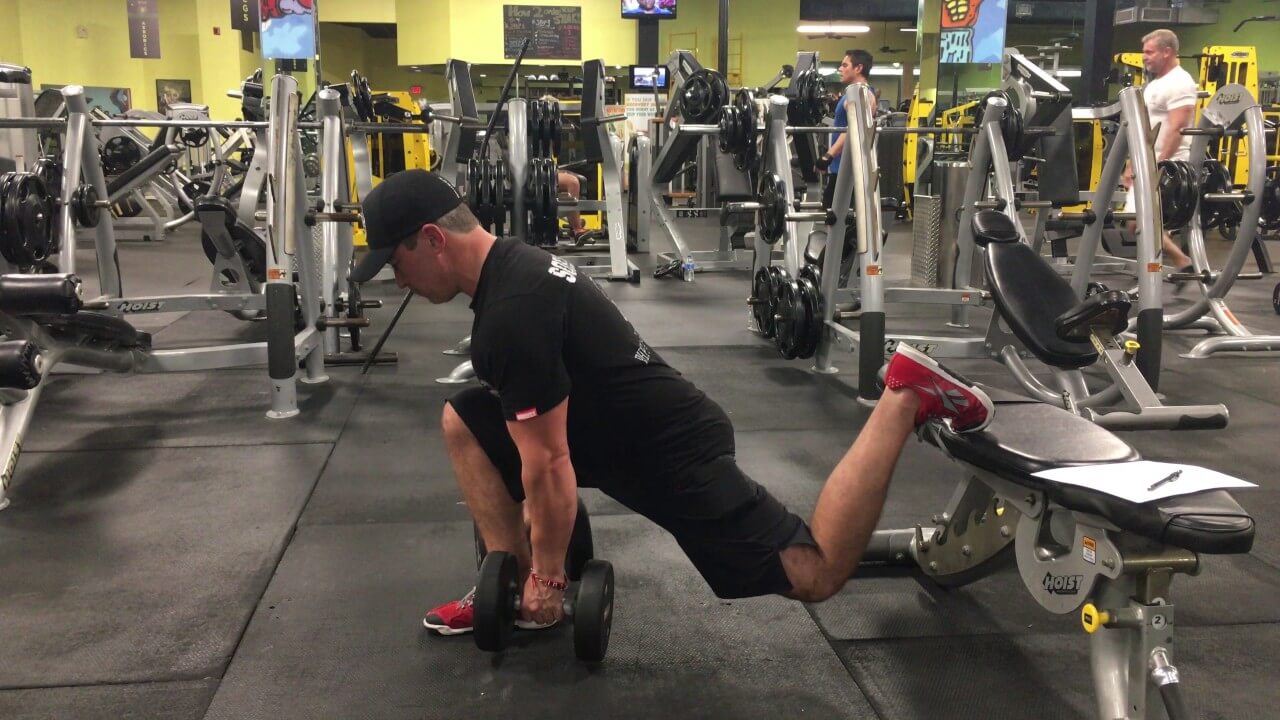
Split squats are lunges on steroids, instead of just taking a step forward, you’ll put your back foot on a bench so that you’re squatting with just one of your legs.
As you can imagine this means you’re going to push the whole load with just one leg, making it way harder.
The Bulgarian split squat exercise will test your balance skills to the max while also helping you grow without the need for more weight. Like lunges, it can be performed with just your body weight, with barbells, or dumbbells if you need more resistance.
Named this way because of the legendary Bulgarian weightlifting team that made waves in the 80s, this exercise will help you build killer glutes, and quads, and build your core strength and balance.
How to do a Bulgarian Split Squat
To perform a Bulgarian split squat you’ll need a bench that goes up to knee height.
Start by standing a step away from the bench with both of your feet shoulder-width apart, now place your back foot on the bench while keeping your front foot on the ground.
If you’re using weights you should load them up before you place your foot on the bench, otherwise, you’re good to go and just need to lower yourself as you would with a regular squat or lunge while keeping your knees from traveling over your toes.
Once your front thigh is parallel with the ground you should drive through your heel to `push yourself back to the starting position and repeat this for 10 to 12 reps and then switch legs.
For this exercise, I’d suggest using dumbbells instead of a barbell just because it’s easier to pick them up from the ground than it is to use a rack to get the barbell up to your shoulders and then walk over to the bench.
Leg Extension Exercise – My Final Thought
Like always, I like to finish by reminding everyone out there, but especially beginners, that it doesn’t matter how much weight you lift. Lifting isn’t about looking good while you’re doing it or impressing people at the gym.
Lifting is about developing your body and staying healthy, so you should always prioritize form over heavier weight and never be afraid to ask someone for help if you feel something isn’t right.
Recommended Readings;
- Best Tasting Huel Alternatives
- Best Sissy Squat Machines
- Hack Squat Alternative Exercises
- Shrimp Squats: What Are They, How to Do Them, Benefits, Muscles Worked, and Alternative Exercises
- One Punch Man Workout – I Did 100 Pushups, 100 Sit-Ups, and 100 Squats for 30 Days – Results and What I Learned!
- Smith Machine Squat – How-To (Video Demonstration), Muscles Worked, Variations, and Alternatives
Sources
- https://www.menshealth.com/fitness/a28008112/leg-extensions/
- https://www.t-nation.com/training/bulgarian-split-squats
Ben Mayz
Hi there! I'm Ben, main author and chief editor at Fitlifefanatics.com. I have been obsessed with Strength Training and Fitness for 18 years now.
My passion for living a happy fit lifestyle is what made me realize that fitness is what I wanted for my future.
I went on to earn my Masters in Sports Training & Biomechanics.
My passion for Strength training & fitness and my love of helping others is what made me start Fitlifefanatics.
Here, myself, and a team of specialist aim to provide the most accurate, and actionable information possible in hopes to help foster the fitness community forward.
You can learn more about Fitlifefanatics on our About Page
